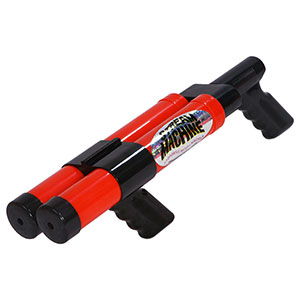
Getting Started
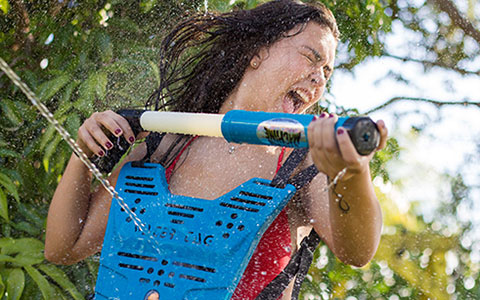
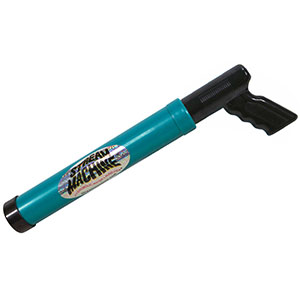
Master your Stream Machine water launcher with our official usage guide. Learn the proper dip-and-pull filling method, techniques to shoot up to 70 feet, and the best water sources for maximum performance and fun.

If your Stream Machine is failing to reach its maximum shooting distance, the most likely culprit is reduced internal pressure. This typically happens when air is trapped inside the tube or when the barrel isn't fully filled. To restore a powerful stream, empty the launcher completely, submerge the nozzle fully in deep water, and pull the handle back in one slow, smooth motion. Keeping the nozzle underwater during the entire fill prevents air from entering and breaking up the water column.
Air pockets and physical blockages are common causes of a "misty" or weak spray. If you see bubbles while filling, it means air is getting into the seal; slow down your pull and ensure the nozzle is deep enough. Similarly, sand, grass, or pool debris can lodge in the nozzle and hinder flow. To clear these, dip the nozzle in a bucket of clean water and cycle the handle several times to flush out any particles. For the best performance, avoid refilling in shallow or sandy areas where the launcher is likely to suck in debris.
The distance of your stream also depends on how you push the handle. A jerky or stop-and-start motion will break the concentrated stream of water, causing it to disperse early and fall short. For the best results, grip the launcher firmly with both hands and push the handle forward in one steady, continuous motion. You’ll want to keep the nozzle underwater for a second after filling before you start your push. This helps maintain high pressure from the very beginning of the shot.
To keep your Stream Machine shooting up to 70 feet, regular maintenance is key. After using it in a lake, ocean, or chlorinated pool, always rinse the unit with fresh water to prevent mineral buildup and seal wear. Inspect the barrel and nozzle periodically for cracks or leaks that could break the vacuum seal. By ensuring the tube is completely filled with water and free of debris, you can maintain the high-velocity performance that Stream Machine launchers are known for.
When troubleshooting a handle that feels stuck or loose, it is important to avoid using force. Never jerk the handle or use excessive strength to clear a jam, as this can damage the internal components. Additionally, you should never use oils, grease, or household lubricants inside the barrel. These substances can ruin the seals and attract more dirt. Using clean, fresh water for all rinsing and flushing is the safest way to restore smooth operation.
A handle that is difficult to move is often the result of sand, grit, or mineral deposits creating friction inside the tube. To fix this, perform a deep flush by submerging the nozzle in a bucket of clean water and cycling the handle 10 to 15 times. If the movement feels sticky rather than gritty, this is often caused by dried chlorine or salt. Rinsing your Stream Machine with warm (not hot) water can help dissolve the residue. Continue cycling until the handle slides smoothly through the entire barrel.
If the handle feels unusually loose or fails to build pressure, there is likely air trapped inside the tube. This happens when the launcher is partially filled or the nozzle is lifted out of the water too soon. To restore pressure, fully extend the handle to empty the tube, then submerge the nozzle completely and pull back slowly. Watch for bubbles during the pull; if you see them, keep the nozzle underwater and repeat the process more slowly to ensure a solid column of water.
In some cases, a handle issue may be caused by physical damage rather than debris. If the handle jams at the exact same spot every time, there may be a crack inside the tube that requires attention. Similarly, if the launcher holds water but still fails to produce a strong stream after multiple priming attempts, the internal seals may be worn out. Regular cleaning and proper filling techniques will prevent most issues, but visible cracks or permanent seal failure may require a replacement unit.
It is normal for a Stream Machine to drip slightly from the front nozzle after filling or between shots. Because the launcher is designed to intake and output water through the same opening, gravity may cause minor seepage, especially if the nozzle is pointed downward. However, heavy leaking that quickly empties the tube or significantly reduces your shooting range indicates an issue that needs to be addressed.
The most common cause of excessive leaking is trapped air or a partial fill. To fix this, submerge the nozzle completely and pull the handle back slowly and smoothly. Ensure the nozzle stays underwater throughout the entire pull to prevent air gaps. Once filled, lift the launcher level rather than pointing it down, and maintain a smooth, steady push when firing to maximize pressure and minimize unwanted drainage.
Particles like sand, silt, or grass can get lodged in the nozzle and prevent a tight seal, leading to uneven streams and constant dripping. To resolve this, perform a fresh water flush by submerging the nozzle in a bucket of clean water and cycling the handle 10 to 15 times. After using your launcher in a lake or at the beach, always rinse the exterior and flush the interior to clear out any grit that could damage the internal seals.
If your water launcher continues to leak heavily after a thorough flush and proper refill, inspect it for visible cracks or worn seals. Water pouring out quickly or an inability to build pressure is a sign of structural damage or long-term wear. In these cases, the launcher may need replacement. By holding the unit level and storing it empty, you can prolong the life of the seals and ensure consistent performance season after season.
If your Stream Machine stream sputters, sprays, or loses distance, the most common causes are air trapped inside the tube or small debris (sand, grit, leaves) restricting flow. Both issues reduce pressure and break up the water stream. Use the priming and flushing steps below to restore full performance quickly and safely.
Priming means filling the tube completely with water so the piston can build pressure. Air usually enters when the nozzle is not fully submerged or when the handle is pulled too quickly during filling.
If you are in shallow water or near a shoreline, a bucket or tub filled with clean water is the fastest way to prime properly. It gives you consistent depth and reduces bubbles caused by moving water.
Sand and grit often get pulled into the tube when filling in very shallow water or near the shoreline where sediment is disturbed. Debris can increase friction, cause the handle to feel rough, and partially block the nozzle, reducing pressure and distance.
Flushing removes grit without damaging internal seals. Avoid forcing the handle if it feels gritty or stuck.
After playing in natural water or sand, flush the launcher with clean water before storing it. This helps prevent buildup and keeps the handle sliding smoothly.
If your handle moves smoothly but the stream looks scattered or weak, the nozzle may be partially clogged. If the handle feels gritty or drags during movement, debris is likely inside the tube.
If you have repeatedly primed and flushed with clean water and the launcher still sputters, leaks, or cannot build pressure, there may be seal wear or damage that requires replacement.
Most performance issues are solved by fully priming (removing air) and flushing debris using clean water. A complete fill and a smooth push restore a strong, concentrated stream and longer distance.
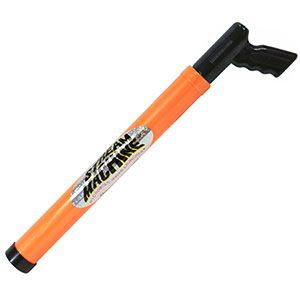
Master your Stream Machine water launcher with our official usage guide. Learn the proper dip-and-pull filling method, techniques to shoot up to 70 feet, and the best water sources for maximum performance and fun.
Learn how Stream Machine water launchers work: dip the barrel to load, pull the handle to fill, and push to fire a powerful water stream. Includes tips for best range and fast reloads.
Step-by-step guide showing how to fill a Stream Machine water launcher using the dip-and-pull method. Learn how to avoid air pockets and get stronger water streams.
Learn the proper technique to shoot a Stream Machine water launcher up to 70 feet. Improve distance, pressure, and accuracy with simple step-by-step tips.
Find out how much water a Stream Machine water launcher holds and which water sources work best for refilling - pool, lake, bucket, tub, and more. Tips for stronger streams and cleaner refills.
Having trouble with your water launcher? Learn how to fix weak water pressure, stuck handles, or air in the tube. Our Stream Machine troubleshooting guide covers leaks, sand removal, and performance fixes to get you back in the game.
Fix a Stream Machine that is not shooting far. Learn the most common causes of weak streams - air in tube, poor fill, debris, seals - and simple step-by-step solutions.
Fix a Stream Machine handle that feels loose, sticks, or will not slide smoothly. Learn common causes like air, debris, swelling, and wear plus safe step-by-step solutions.
Learn why a Stream Machine may leak from the front nozzle and how to fix it. Common causes include air, partial fills, debris, worn seals, and pressure technique.
Fix air in the tube and remove sand or debris inside your Stream Machine. Learn how to prime properly, flush grit safely, and restore strong distance and pressure.
Learn how to clean and maintain your Stream Machine water launcher. Get expert tips on salt water rinsing, mold prevention, and off-season storage to ensure your launcher lasts for years.
Learn how to rinse and clean your Stream Machine after pool chlorine or salt water use. Simple flush steps help prevent buildup, sticking handles, and weak streams.
Keep your Stream Machine clean and odor-free. Learn how to drain, rinse, dry, and store your water launcher to prevent mold or mildew after pool, lake, or bucket use.
Protect your Stream Machine from sun and heat damage and store it correctly in the off-season. Learn drying, rinsing, indoor storage, and freezing prevention tips.
Contact options may differ depending on the type of help you need.